Linux · Ubuntu / Debian / Arch / Fedora
VPN Setup on Linux
Terminal (TUI) and graphical (GUI) Linux clients with full system TUN interface and Happ routing rules support.
-
Step
App Installation
WhoisThat is a modern terminal-based (TUI) VPN client for Linux powered by Xray-core with Happ routing support. Run the install script or install via AUR.
-
Step
Add Subscription
Click the button below to add subscription via wit:// deeplink (Happ routing rules are applied automatically from subscription headers), or copy the link and add it manually in WhoisThat (Manage subscriptions -> Add new subscription) or run: whoisthat sub add <url>
-
Step
Connect and use
Launch WhoisThat by typing whoisthat in terminal. Select your server and press Enter to connect. Press v to toggle TUN mode (system VPN), d to disconnect, and q to detach the TUI while keeping connection alive in background.
-
Step
App Installation
Choose the version for your device, click the button below and install the app.

-
Step
Add Subscription
Click the button below to add subscription
-
Step
If the subscription is not added
If nothing happens after clicking the button, add a subscription manually. Click the Get link button on this page in the upper right corner, copy the link. In FlClashX, go to the Profiles section, click the + button, select the URL, paste your copied link and click Send
-
Step
Connect and use
Select the added profile in the Profiles section. In the Dashboard, click the enable button in the lower right corner, and then turn on the switch next to the TUN item. After launching, in the Proxy section, you can change the choice of the server to which you will be connected.
-
Step
App Installation
Choose the version for your device, click the button below and install the app.

-
Step
Add Subscription
Click the button below — the app will open and the subscription will be added automatically
-
Step
Connect and use
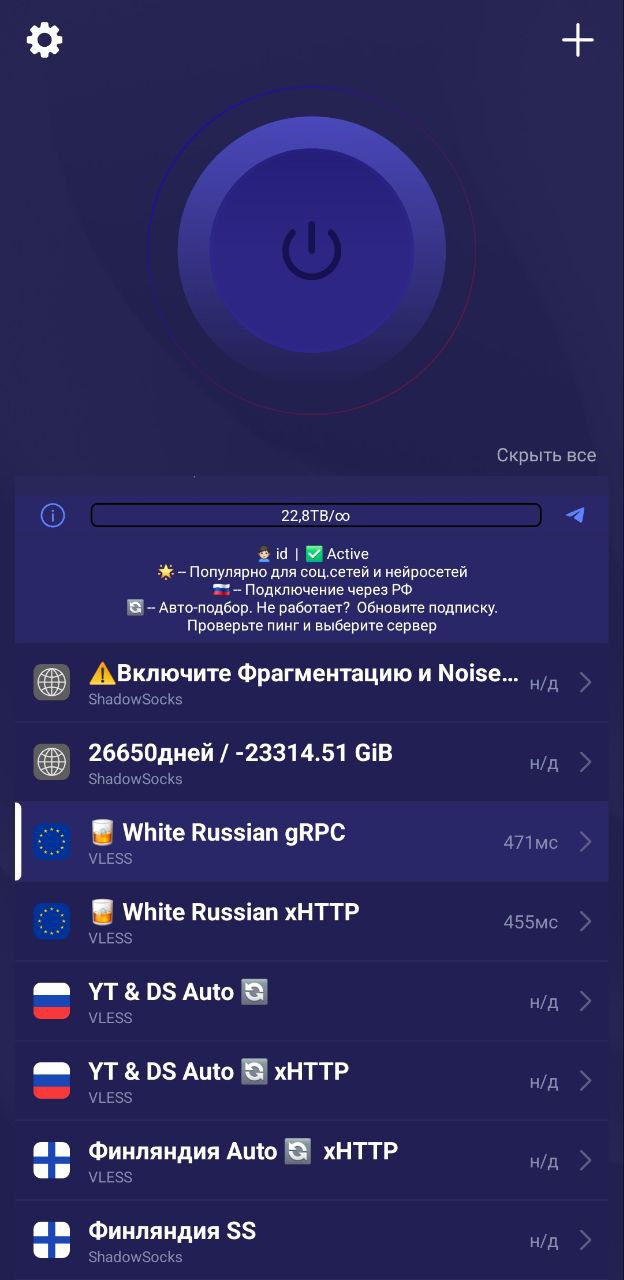
In the main section, click the large power button in the center to connect to VPN. Don't forget to select a server from the server list. If needed, choose another server from the server list.
-
Step
App Installation
Download and install Throne.
-
Step
Enable HWID
On the main screen, enable TUN Mode. Click the settings button, select General Settings, go to the Subscription section and enable Send HWID option.
-
Step
Add Subscription
Click the button to copy the link. In Throne, click the Profiles button on the main menu and select Add Profile from Clipboard. When asked how to update, select Create New Subscription Group.
-
Step
Add routing rules
In Throne, click the Routing button on the main menu and select Download Profiles menu. Choose one of the required profiles. For Russia: ByPass_Russia, Proxy_Refilter, Proxy_Russia_Blocked. For Iran: Bypass_Iran. For China: Bypass_China or Proxy_China_Blocked.
-
Step
Connect and use
In the added subscription group, select the required server, right-click and click Connect.
Direct App Guides for Linux Ubuntu / Debian / Arch
You can switch apps using the tabs at the top of this page or open a dedicated permanent link for any client:
Need Help?
Ask our instant AI Assistant trained on all @OutlineKeysRobot manuals, open the bot to manage your keys, or message our support team.